Setting Salomon S9 12 TI ski bindings
Published by marco on
Every time I want to adjust my ski bindings, I (A) remember how easy it was to adjust them last time and (B) forget how it worked.
It is very easy to adjust the binding for boot length.
- Get a flathead screwdriver
- Place the screwdriver under the thick metal tab (found below the large flathead screw)
- Lever the screwdriver up to lift the tab
- Slide the binding assembly backward or forward to suit the boot size[1]
- Make sure that the assembly clicks back into place
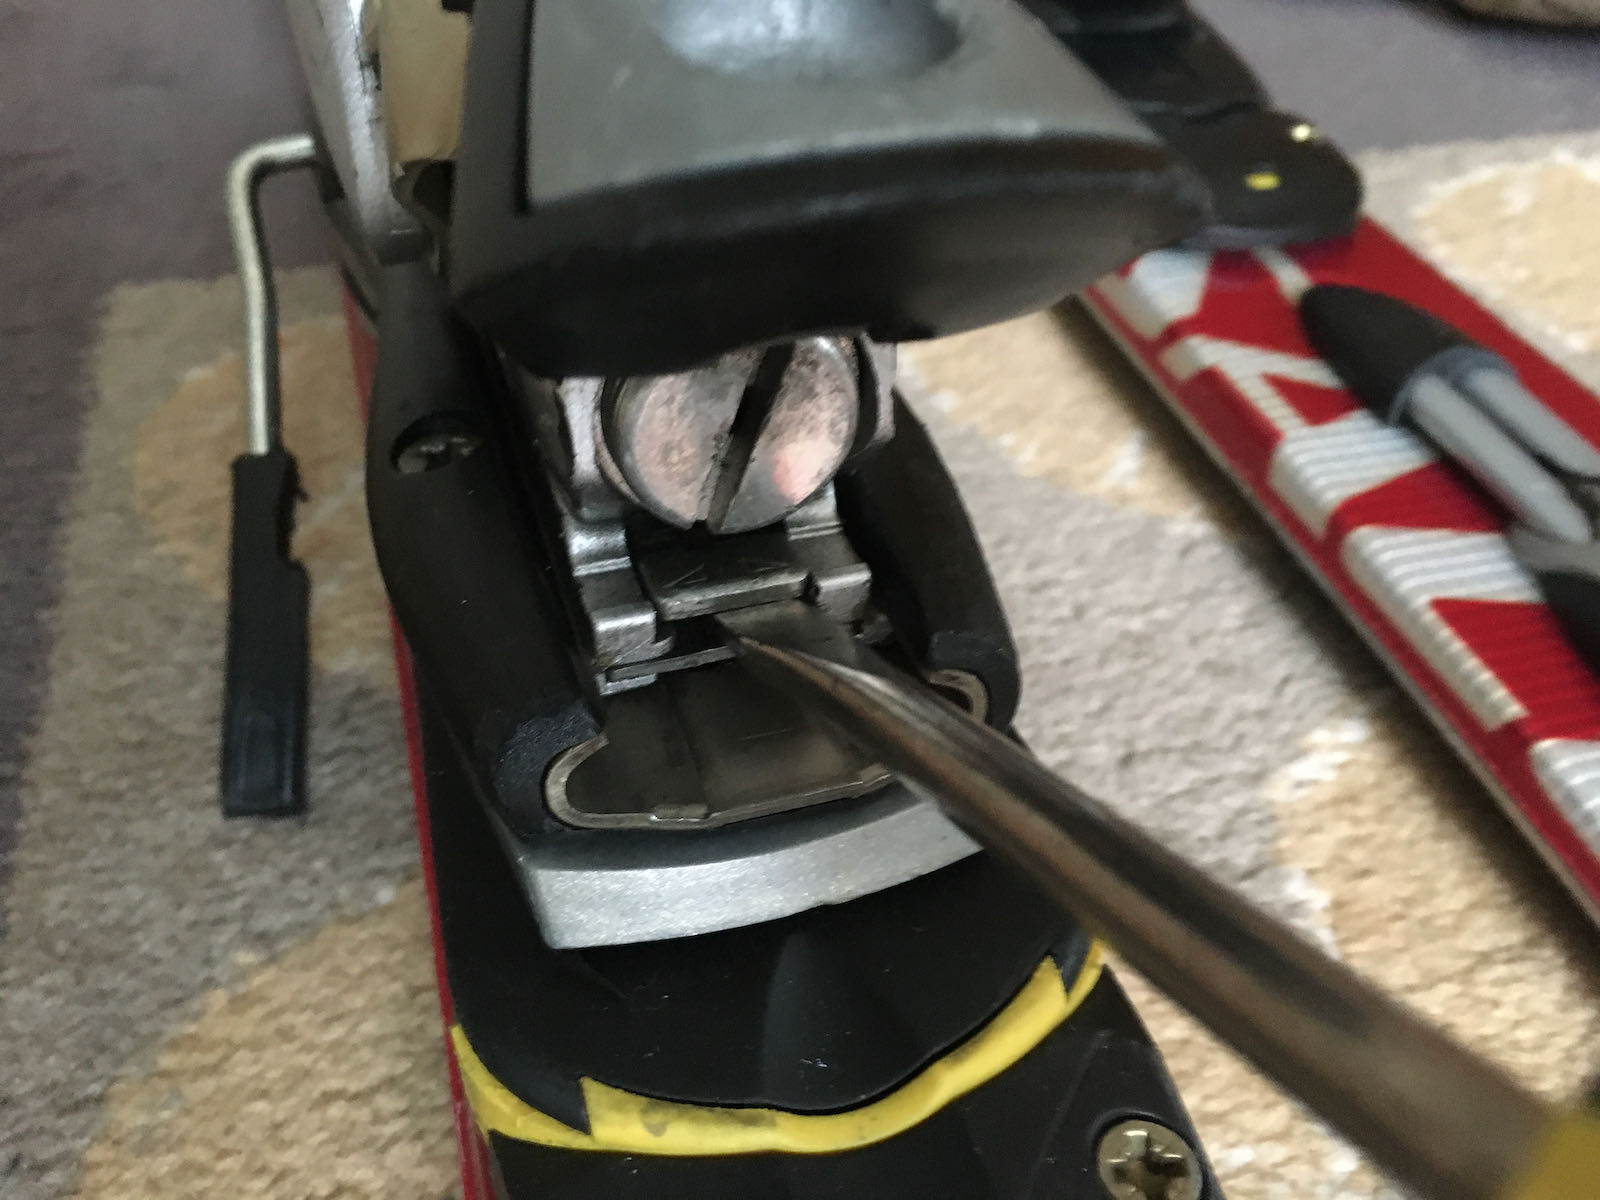 Setting Salomon S9 12 TI ski bindings − insert screwdriver
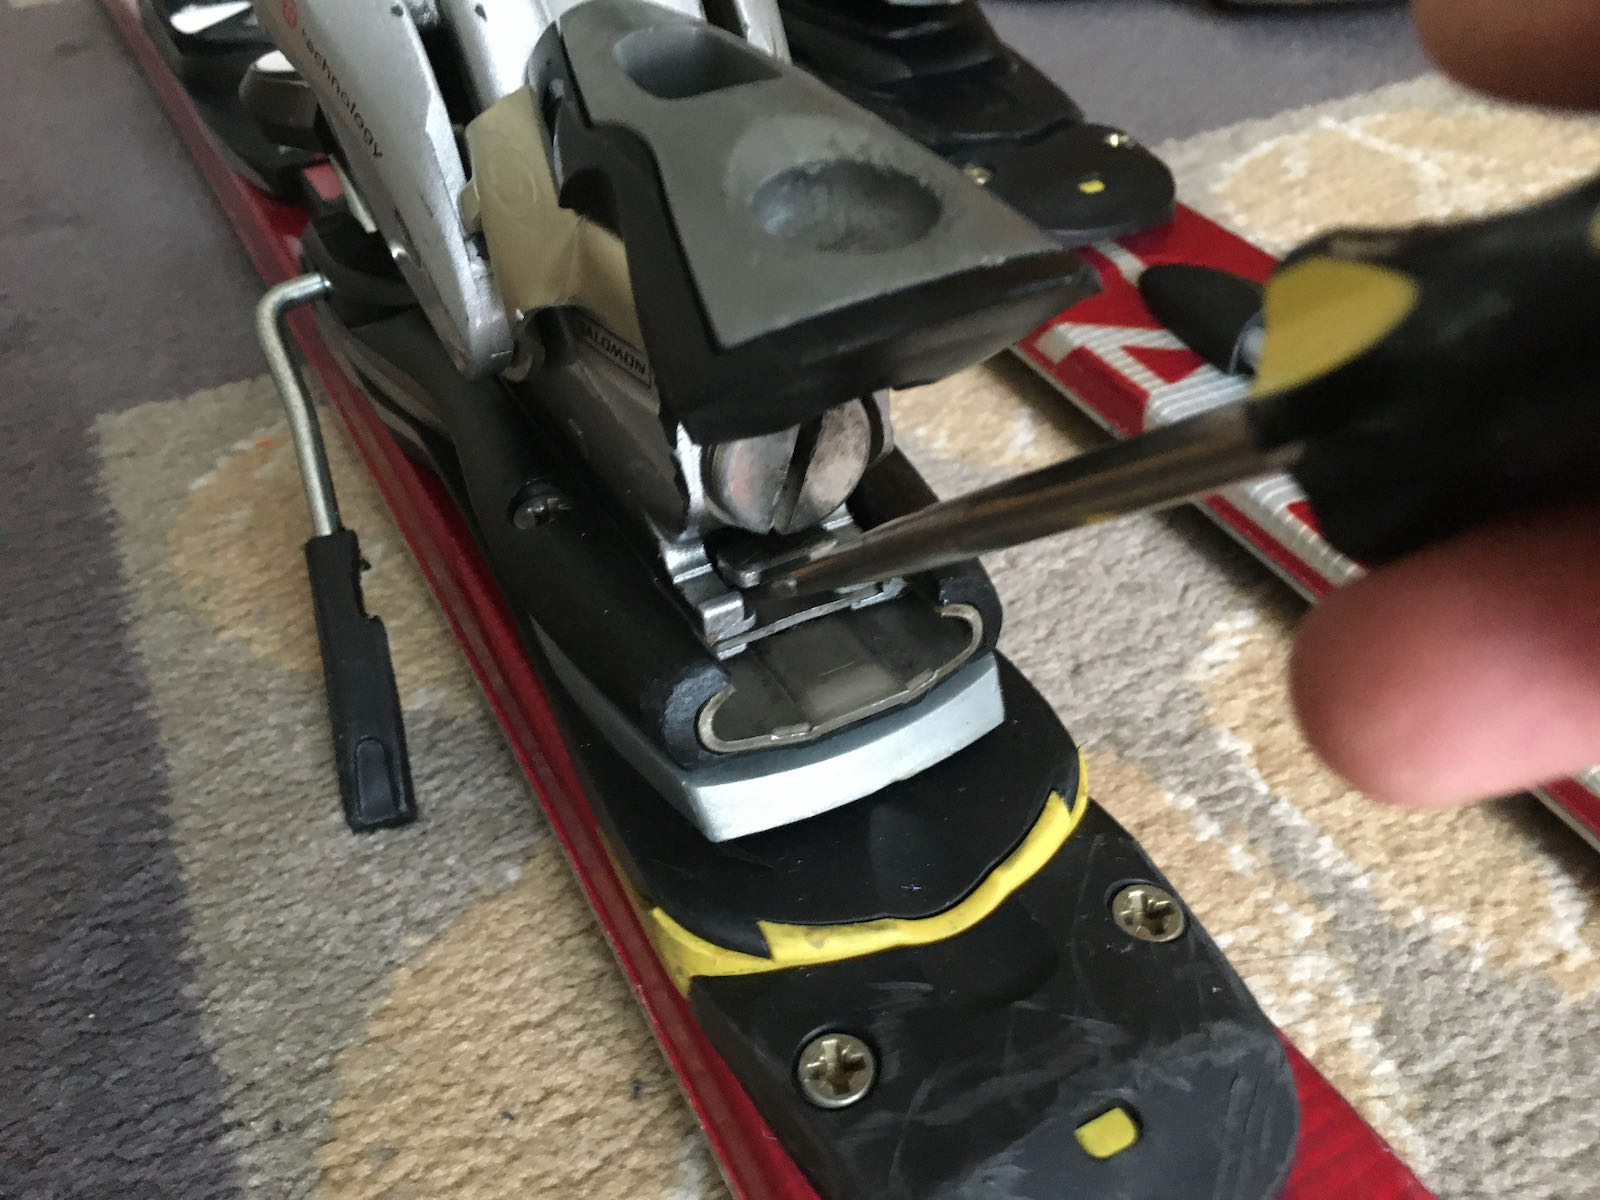 Setting Salomon S9 12 TI ski bindings − lift screwdriver
Click either of the images to show a larger version.
[1] You’ll need both hands to keep the screwdriver lifted and slide the assembly. It’s not “easy”, but it works pretty well once you’ve got the hang of it.↩
Justification
Why did I write this? Because every other damned guide on the Internet is a 5-10–minute video explaining everything but how to do the one thing I wanted to do. Either that, or it’s a wall of text with no useful images (see below). It’s not rocket science, but after a year or two of not doing this, I’ve usually forgotten about the tab—and get all intrigued with the myriad screws available on the binding.
Unscrewing things is a bad idea. Do not unscrew anything unless you absolutely have to. You do not have to unscrew anything in order to adjust for a boot—unless the boot is just way too big or small for the binding placements, in which case you’ve got a lot more work ahead of you than you thought.
The guide I ended up using is the enticingly named How to Adjust Salomon Ski Bindings. With no insult intended to the author, this article feels like it was written by an AI or perhaps had been translated back and forth a few times with DeepL.
In case you think I’m being unfair, I’m going to cite the section that “helped” me in full,
“Now to get this next step you must pay close attention since it is an important part of the process. First, if your boot clicks on the link, this alone does not mean that the configuration of these links is the most appropriate. As a general rule, the boot could click on the link independently.
“[Um, what?]
“Therefore, when the boot performs a click, then the metal tab should be between the external and internal hash marks. When we talk about the metal tab we are referring to that tab that you initially raised to move the binding.
“[The part above is what actually helped me remember about the tab.]
“Therefore, if this tab is in this place, that is, between these marks, and is also blocked, then the starting pressure will be adequate or correct. Now, if the metal tongue is located in the housing of the heel piece, or if it is hanging beyond the mark corresponding to the outer hash, we would be talking that the forward pressure is too much, or too low.
“[🤔🤷🏼♂️🤔🤷🏼♂️🤔🤷🏼♂️]
“From this point, you must click on the union with the boot to discern the level of forward pressure. To do this, the metal tab should be located on the internal and external marks, but only at the moment when you do not click on the binding boot. This step must be done with considerable care as there are many incorrect positions for this case.”
I read a lot of tutorials online and this is one of the more inscrutable I’ve encountered. Cheers to them for reminding me about the metal tab, though.