(3) How to add a picture to an album
Published by marco on
This article is part (3) of a multi-part earthli Albums tutorial.
Before you start adding pictures, you should read the article Uploading pictures in earthli Albums (earthli News) to learn how to prepare pictures for publication online.
Adding a picture is just as easy as editing one. Picking up from where we left off in the navigation tutorial at the Galapagos home page, we see the page below:
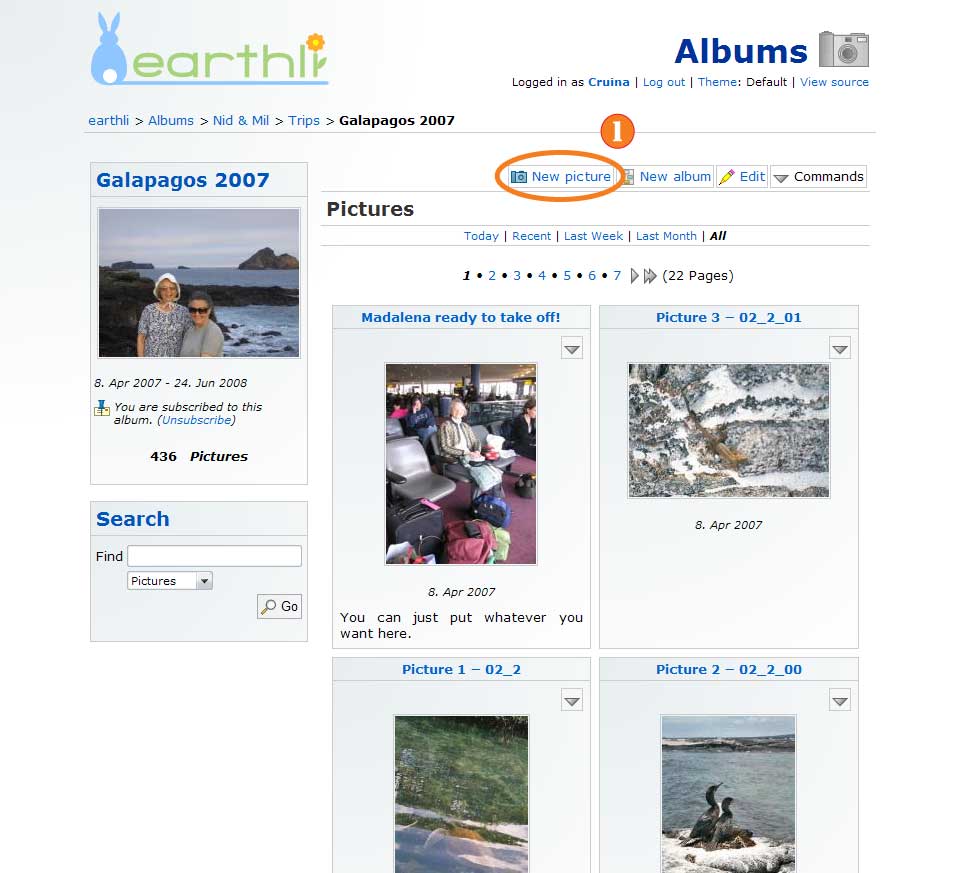 Create New Picture for Galapagos (click to enlarge)
Press the “New Picture” button (1) to go to a page where you can upload pictures:
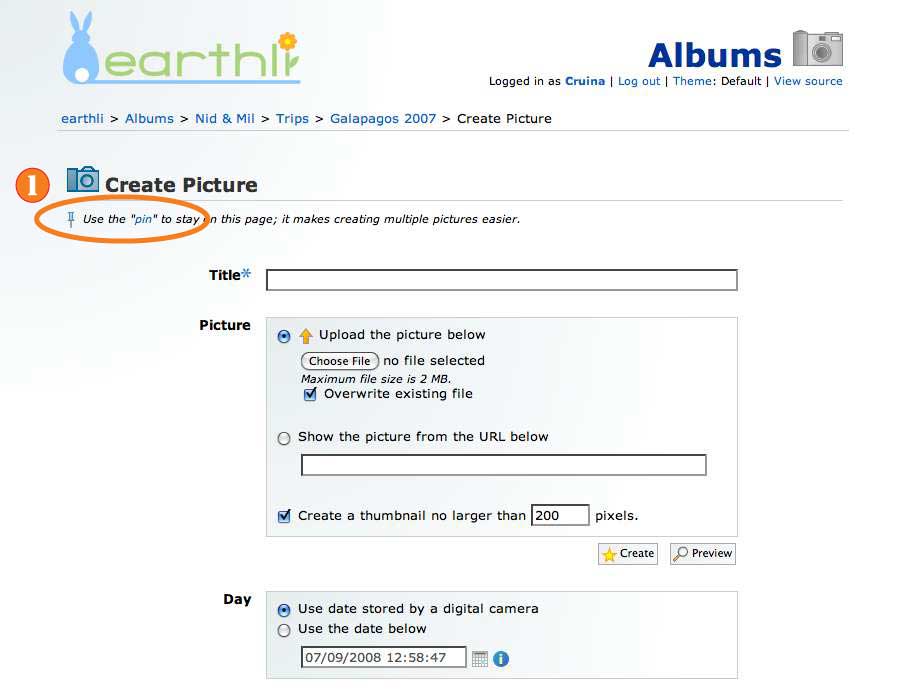 Add Picture Page (click to enlarge)
Above the form, you can see a little pin (1); select it to stay on this page after you upload a picture—it makes uploading multiple pictures much quicker. Once you select the pin, you should see the page below:
 Upload Picture (click to enlarge)
At the top of the page, you can see that you’re now “pinned” (1) to this page. As usual, you have to fill in a title, but you also have to select a file (2) from your computer to upload (this part looks different depending on which web browser you use). Any modern digital camera adds the date and time of the photo to the picture, so make sure that “Use date stored by a digital camera” (3) is selected (if there is no date in the picture, you’ll get an error and you can fill in the date by hand). If you don’t need to see the picture, just press “Create” to add the picture to the album; we’ll preview before we add, so press “Preview” (4) to show the page below:
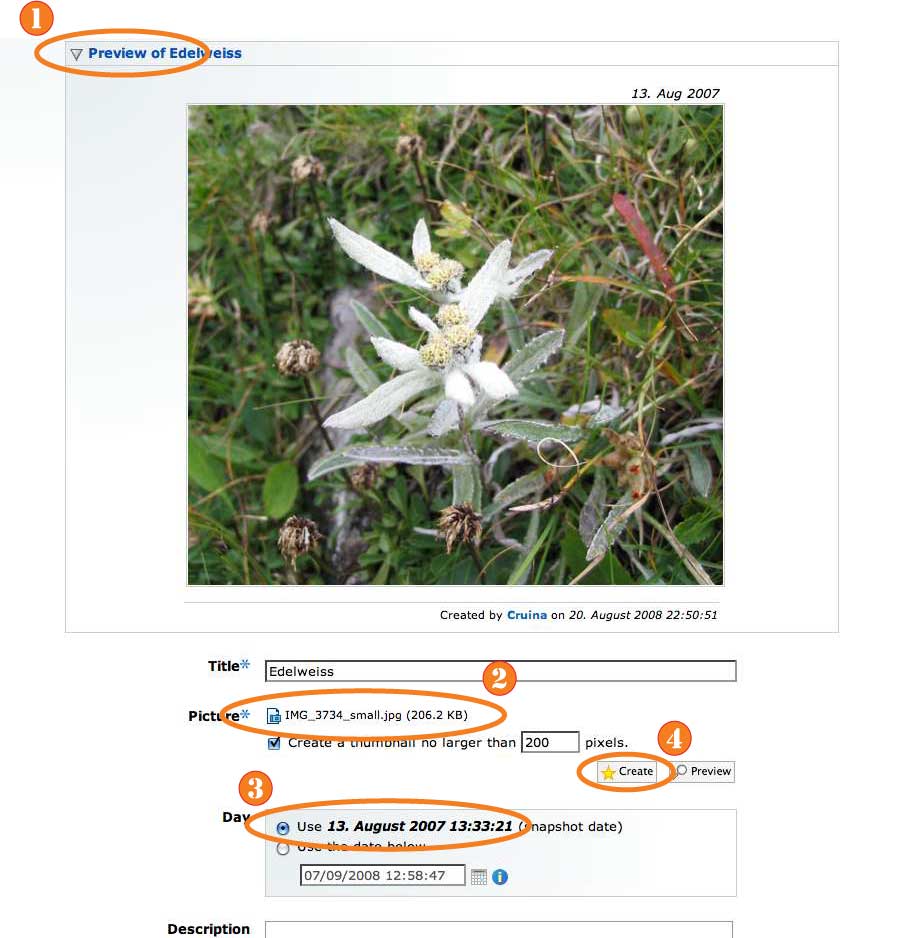 Preview Upload (click to enlarge)
The preview appears above the form (1); select the small triangle to hide the preview or scroll down to see the form. You can see that the picture has been uploaded and is displayed with its file name and size (2). The date was also automatically extracted from the picture and is shown for the date (3). In addition to the title, you can also add a description before pressing “Create” (4) to finish adding the picture to the album.
Because we’re pinned to this page, you’ll come back to this page, as shown below:
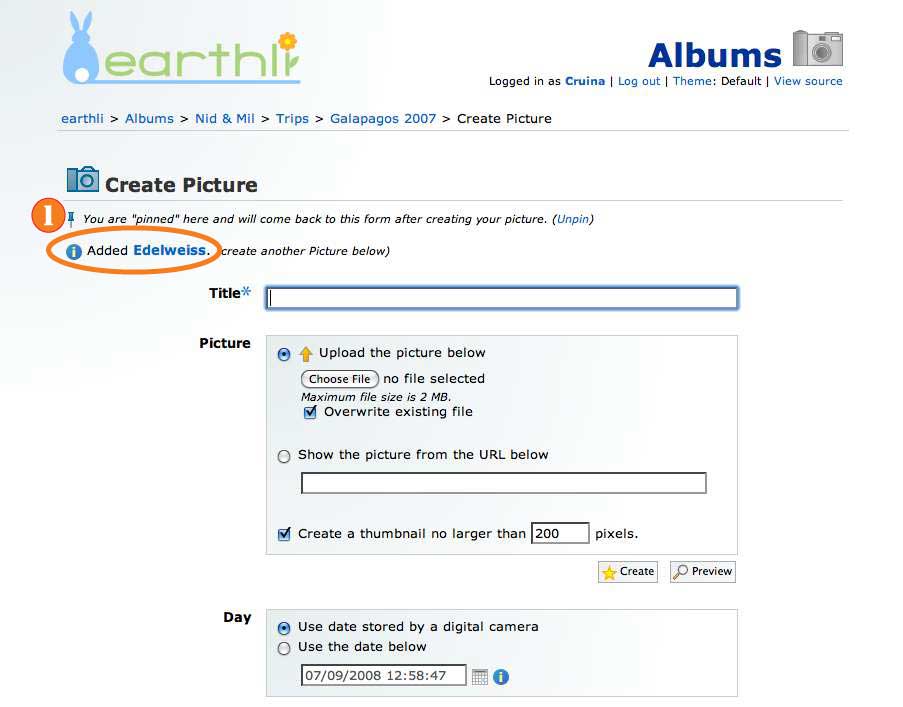 Upload Next Picture (click to enlarge)
Above the form, you can see a confirmation message (1) that the last picture was uploaded successfully. From here, you can continue uploading pictures by repeating the steps above.
If you prefer, you can also upload multiple pictures at once.
Continue on to (4) How to edit a picture.