(5) How to Add a Default Template
This article is part (5) of a multi-part Book Library tutorial.
When you’re adding books, you might find that you’re always filling out certain fields—like “Location” or “Owner”—with the same information. The Book Library can fill out these values automatically when you create a new book if you set up a default template.
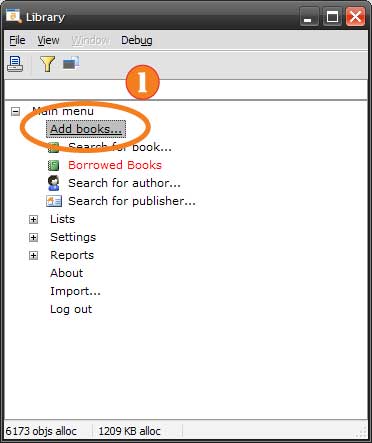
When you start the Book Library, you’re taken to the main menu, as shown below:
 Choose Add from the Main Menu (click to enlarge)
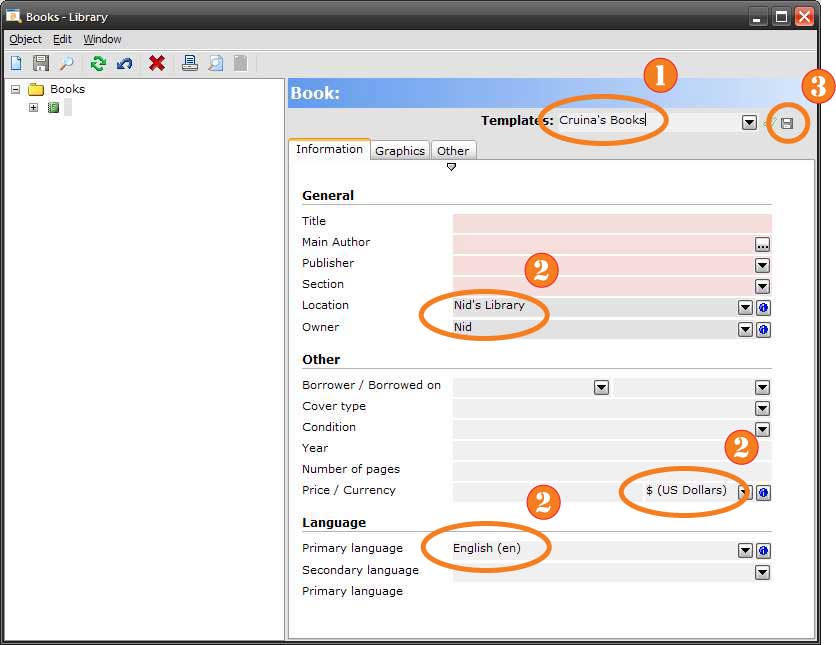
Just as when adding a book, select “Add Books” (1) from the menu. You’ll be shown the explorer window, set up to add a new book. After filling in the desired default values, you should have something like the window below:
 Values for Saving a Template (click to enlarge)
In this window, we’ve filled in the values we want to save with the template (2), like the “Location”, “Owner” and so on. We’ve also typed a name for our template next to “Templates” (1); press the “Save Template” button (3) to show the window below:
 Choosing a Save Location (click to enlarge)
Pressing the little arrow for “Template available for” (1) shows the list of values; choose “This user on this machine”.
 Settings for Saving a Template (click to enlarge)
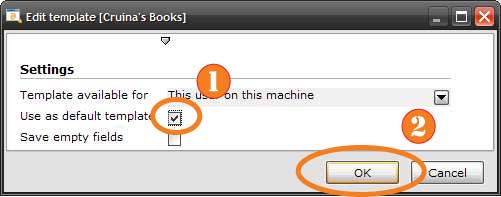
To make the template you selected the default one—that is, used for new books—check the box next to “Use as default template” (1). Press “OK” (2) to save your changes and close the window.
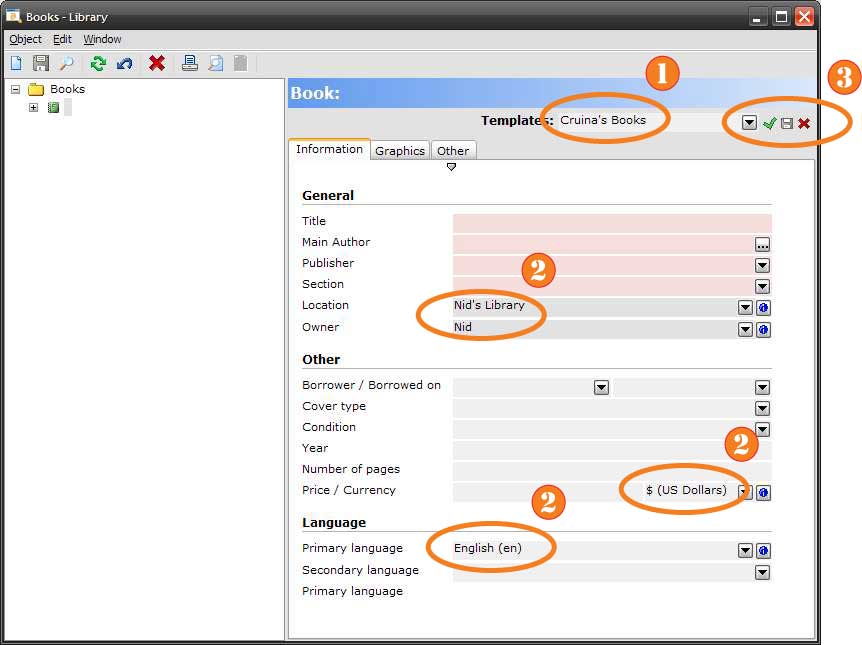
Now, if you press the “New” button in the toolbar on the explorer window (or type “Ctrl+N”), a new book has the values from your template pre-filled, so that you don’t have to fill them in yourself anymore, as shown below:
 A New Book Using the Default Template (click to enlarge)
Your template is selected (1) and the values (2) are pre-filled, as expected. There are also some buttons (3) for applying, saving and deleting the selected template (“Cruina’s Books” in the example).
Continue on to (6) How to edit a Book.